Converting Color Negatives into Positive Images with ACDSee Ultimate
2022 © Thomas GadeIndex: From Negative to Positive
ACDSee Ultimate contains a RAW converter that is very well suited for tonal inversion and color correction of photographed color negatives. The most important tool for this task is the Tone Curve. The histograms of all three color channels are clearly visible, and the curve itself (a diagonal line in its initial state) is easy to adjust.
Note: In Adobe Lightroom, the Tone Curve is more difficult to handle, and the graphics of the individual color channels are barely distinguishable from the gray background.
The conversion into a positive image described in this tutorial was performed using ACDSee Ultimate 8. The same procedure also works with later versions of ACDSee Ultimate Photo Studio.
Color Negative

 |
 |
|||
Inversion - Tonal Value ReversalThe conversion of a negative into a color-correct positive image is performed in three steps using the Tone Curve. In the first step, the tonal values of each channel are inverted. To do this, move the black points (left side) upward and the white points (right side) downward. |
||||
 |
 |
 |
||
|
1.
Inversion of the Red Channel Move the black point (left) upward and the white point (right) downward. |
||||
 |
 |
 |
||
|
2.
Inversion of the Green Channel |
||||
 |
 |
|||
|
3. Inversion of the Blue Channel
Correcting the Tonal Values The inverted image has a noticeable color cast. Due to the orange mask of color negative film, it usually has a blue tint and low contrast. To correct this, move the black points along the upper edge from the left until they align with the beginning of the histogram. Move the white points (right side) to the end of the histogram. |
||||
 |
 |
 |
||
|
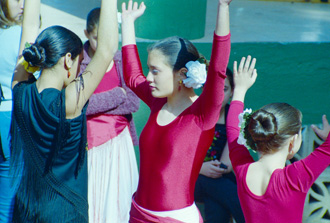
This correction increases the contrast of the image and moves the colors closer to a natural appearance. However, this is still not sufficient.
|
 |
|||
Correcting Color Casts by Adjusting the Tone Curves in Individual Channels |
||||
 |
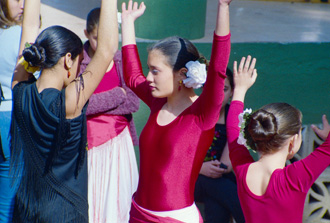
For this image, bending the Red channel curve produces the correct result. The colors are now accurate, but the image is still too bright. |  |
||
 |
Adjusting Brightness
The Tone Curve is switched to RGB mode and lowered in the center until the brightness appears correct. |
 |
||
Presets Speed Up the Workflow
Converting additional negatives into positives can be significantly accelerated by saving the sequence of editing steps as a preset. This preset can then be applied to other negatives. It is also possible to save different intermediate steps.Saving the Inversion as a Preset
It is useful to create a preset that contains only the inversion of the three Tone Curves in all three color channels. Give it a clear name such as "Invert", "Negative to Positive", or "Tonal Inversion".
This preset can convert all photographed negatives into basic positive images. However, these images will still require individual tonal and color corrections.

To save a preset, click the gear icon (Settings) and then select "Save Preset".
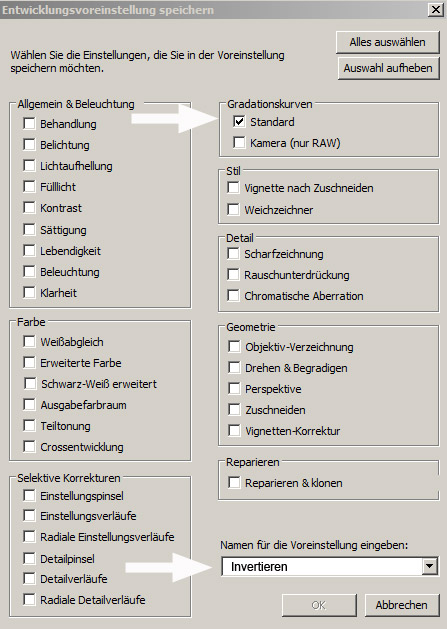
In the following dialog, activate the check box for Tone Curves under the Standard settings and enter the name "Invert" for the preset.
Saving Inversion and Additional Corrections as a Preset for Images from the Same Film
Color films from different manufacturers, as well as different film types, produce different results. In addition, many other factors influence the required tonal corrections, meaning that color negatives cannot always be processed with identical settings.
Nevertheless, a well-adjusted preset can often be applied successfully to many negatives from the same roll of film. Our example image is part of a series photographed on a sunny day in Spain. The complete inversion process and the adjustments developed for this photograph also produce good results immediately with the other images from the same roll.
Working with a Preset
A second negative from the same roll of film showing the dancers is opened in Develop mode.

After clicking the gear icon, the preset menu displays the preset "Invert-Flamenco". Select it to apply the settings.

The color negative is then converted into a positive image with natural colors. Additional corrections may sometimes be necessary, but they were not required for this particular image.
This allows you to create different presets for various films and shooting situations, enabling fast processing of photographed color negatives.
An important factor is that the digital reproductions are created with a consistent light source. A diffuse LED light panel with 5000 K color temperature is ideal. This is the setup we use.
The term "Presets" is used in other programs as well. They are predefined editing settings that are not used only once but can be applied repeatedly.
Understanding this technique and using it effectively is important when working on tasks such as converting negatives. Otherwise, the same editing steps would have to be entered again and again manually, which is time-consuming and rather monotonous.
- Index: From Negative to Positive
- ACDSee
- Adobe Lightroom
- Adobe Photoshop
- SilverFast
- SmartConvert