VueScan - Batch Scanning with a Flatbed Scanner
Using the Epson Perfection V700 / V750 as an Example
© Thomas GadeIndex
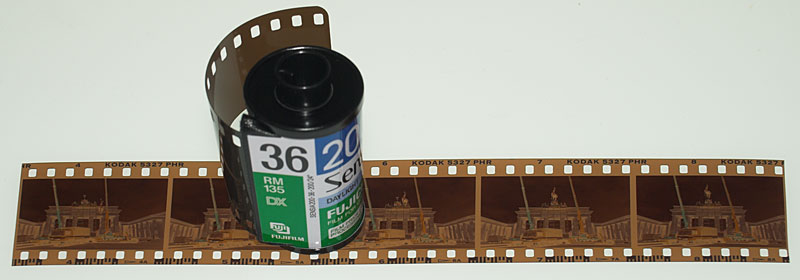
Film strips from 35mm film are to be scanned.
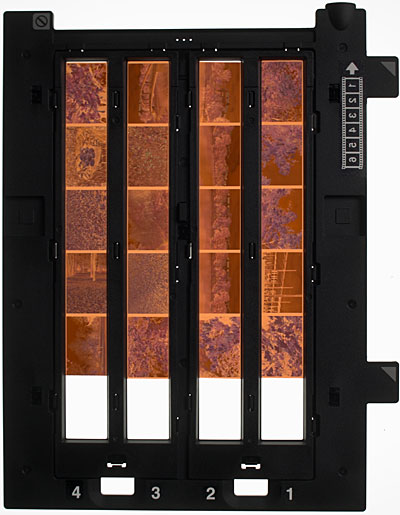
The film holder of an Epson Perfection V750 Pro (also Epson Perfection V700 and 4990) can hold 4 film strips with up to 6 images in 24x36mm format. The films are inserted with the emulsion side (matte side) facing up. The scanner sees the images mirrored. Therefore, the film strips are placed into the holder from right to left.
In the 'Input' tab, set 'Mode' to 'Transparency' and under 'Media' select 'Color negative' for color negatives. 'Preview resolution' is set to 'Auto', and 'Scan resolution' is set to 3600. Higher settings do not produce better results with the Epson scanner and only create unnecessarily large files. 'Batch scan' is initially set to 'Off' until all settings are completed. Depending on the task, set it to 'All', 'List', or 'Auto' just before scanning.
Individual settings can be applied to each image, such as rotation, brightening, darkening, color corrections, and other adjustments. Whether and which ones to use depends on your workflow. I prefer using a general preset that produces files which are later corrected in batches using Photoshop and the ROC Pro 2 plugin. For this purpose, 48-bit RGB files in uncompressed TIFF format are best. I perform rotation and cropping using the program Thumbs Plus 7, which is excellent for editing, labeling, and organizing image data.
Clicking 'Preview' creates a preview image.
Input
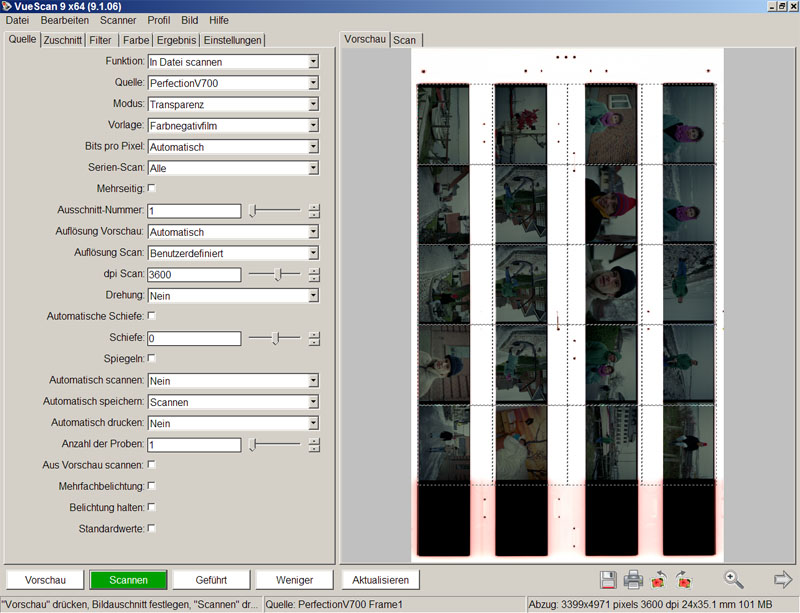
Clicking the zoom tool creates a cropped section that...
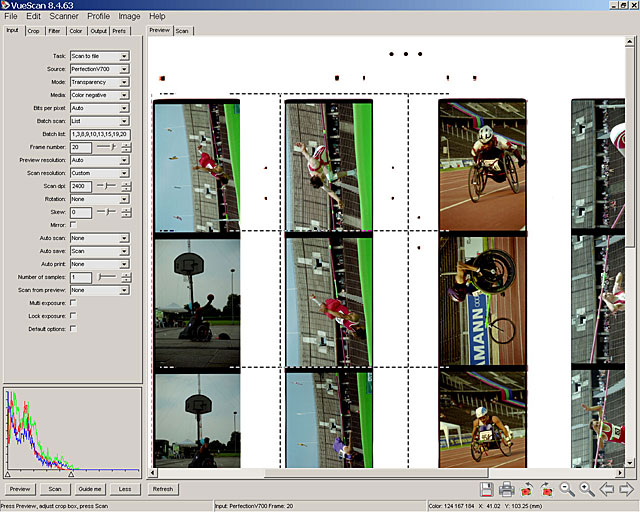
...becomes more detailed with another click. The preview images are well resolved and make it easier to select which images to scan. When dealing with large quantities, it is useful to carefully choose which images actually need to be scanned. Scanning takes quite a long time, and this helps avoid unnecessary scans.

Crop

Under 'Crop', set 'Crop size' to 'Auto', '35mm film', and 'Buffer (%)' to 15.
VueScan detects that a film holder with 4 film strips is inserted in the Epson Perfection V750.
In other cases, however, a custom grid must be defined, where each cell contains an individual image.

Crop size
'Manual' instead of 'Auto'
Size X / Y
These are the dimensions of the crop areas that VueScan suggests for each image. The exact crop for each image can be adjusted individually in the preview using the mouse.
Multi-crop
Custom – this allows the user to define all settings manually.
Number of images X
4 – because four film strips can be placed side by side. The value remains 4 even if not all rows are filled.
Number of images Y
6 – because each strip can contain up to 6 images in 24x36 format. The value remains even if fewer images are present.
Spacing X / Y
Defines the size of the fields in which the images to be scanned are located.
X / Y offset
Defines the distance from the top edge of the scan area to the first row of images. 16 means 16 mm.
Buffer (%)
This field is very important. If part of the image border is scanned, it can influence how scan data is interpreted. To avoid this, a value of 20 is recommended. This means VueScan ignores 20% of the outer edges for data evaluation. These areas are still scanned and displayed correctly but do not affect color interpretation or tonal mapping. This is roughly comparable to center-weighted metering in photography.
In addition to the 24x36 mm format, there are half-frame (24x16mm), Instamatic (24x24mm), and panorama formats. In such cases, the dimensions must be entered under Size X / Size Y. If a full strip contains eleven half-frame images, enter this number under 'Y images'. If a strip contains a maximum of two panoramic images, set 'Y images' to 2.
Setting this up takes time. Therefore, save the result under 'File' → 'Load options' with a clear name, e.g., '4-strip-35mm-film-24x36mm.ini'.
Filter
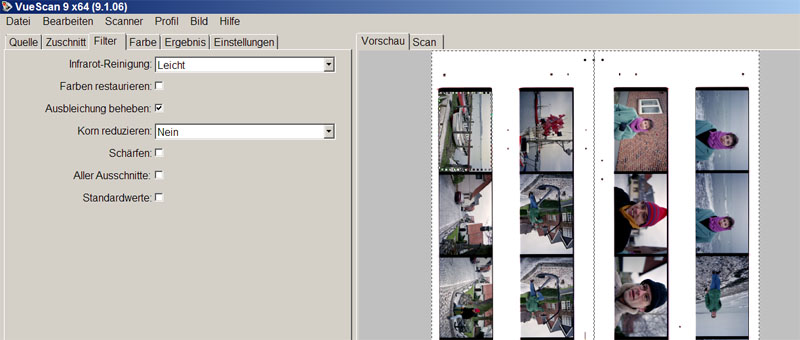
In the 'Filter' tab, set infrared cleaning to 'Light' for color negative film and enable 'Restore fading'.
When scanning conventional black-and-white film, infrared cleaning must be set to 'None'. The 'Restore colors' option usually produces incorrect results.
Color

In the 'Color' tab, film profiles can be selected. 'GENERIC', 'COLOR', and 'NEGATIVE' work well for most images. Choosing a specific film type rarely produces good results and should be tested. Many old films have already shifted in color, making profiles less useful. For output color space, use sRGB or Adobe RGB. Adobe RGB has a wider gamut than sRGB. The white point is set to 1 by default; a value of 0.2 is safer to avoid tonal loss.
Output

Under 'Output', a destination folder is specified and TIFF with '48-bit RGB' is selected as the format. Compression is always set to 'Off'. With modern storage capacities, compression is unnecessary.

Under 'Preferences', 'External viewer' is enabled. 'Graph type' is set to 'B/W'. A histogram then appears in the lower left corner. Unfortunately, it remains visible in all tabs, even though it is only useful in 'Filter' and 'Color'. If it is distracting, disable it in 'Preferences'.
Once all settings are configured...
1. Save settings with clear names so they can be reused.2. In the 'Input' tab, set 'Batch scan'. If 'List' is selected, a new field 'Batch list' appears.

Enter the numbers of the images to be scanned here, separated by commas. Count row by row from left to right. The first row contains images 1 to 6. The second row starts with image 7. VueScan always counts all fields, even if film strips are shorter.
3. Click Scan...
Table of Contents:
General
IntroductionCalibration
Scanning black-and-white film
Scanning color negatives
Scanning slides
Identifying film types
Tabs
SourceCrop
Filter
Color
Output
Settings